NIK service specialists advise: How to prepare your plow for work? - Part 1
Part 1: Preparing the tractor
To achieve maximum efficient operation, you need to make the correct settings of the tractor before starting work in the field. First of all, when using a reversing plow, the tractor settings on the left and right should be identical. The internal clearance between the front and rear tires of the tractor is very important. In fact, it controls the width of the first furrow of the plow. Make sure that the internal clearance between the rear tires of the tractor is within the limits specified in the operating manual of the plow. The distance between the front should always be from 0 to 10 cmwider relative to the distance between the rear tires of the tractor. In this way you guarantee an even first furrow.The inner part of the rear tires should always be in contact with the wall of the groove. It is good to check the tire pressure in advance. To ensure optimum stability, grip and performance, make sure the tyre pressure is as recommended in the manufacturer's manual. [caption id="attachment_15502" align="aligncenter” width="895"]
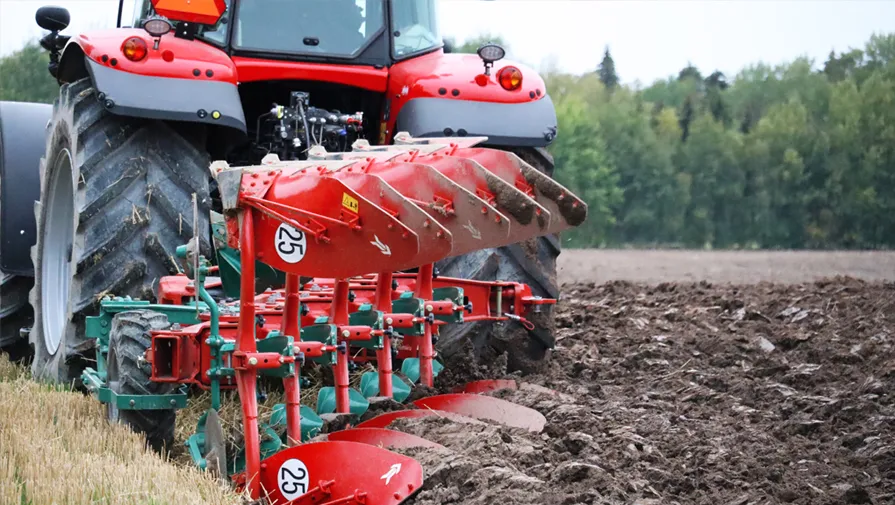
Track whether the tractor is running at the same angle in both directions.[/caption] If the tire pressure is not equalized, the plow will tilt to one side. This, in turn, will affect the quality of the plow.Make sure that the arms of the canopy system when connecting the tractor, are set to the same height. The easiest way, therefore, is to measure the length of the shoulders.
Part 2: Preparing the Plow
Let's now take a look plow. There are a few things you need to set up on the inventory before you start working with it. First of all, check that the crossbar is located centrally relative to the base. The tractor and the plow are connected by a three-point canopy system. To ensure that the inventory follows the tractor correctly, it is important that the crossbar be of the correct length. Thought extensions of the shoulders of the shed should intersect just behind the front axle of the tractor. If the crossbar is too short, the plow arms will be almost parallel, and the inventory will not follow the tractor, but will wobble from side to side. [caption id="attachment_15490" align="aligncenter” width="895"]
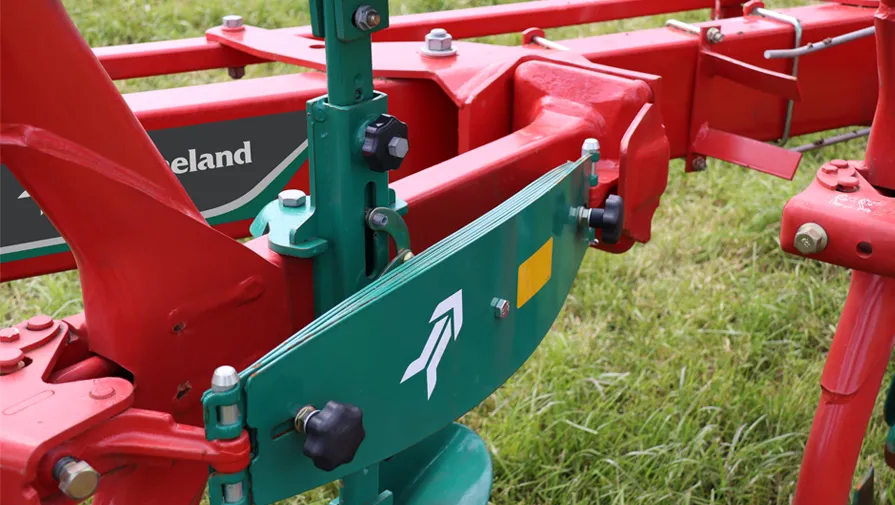
After these adjustments and adjustments, the plow can be aggregated to the tractor.[/caption] Kverneland features Auto-reset system, its correct setting for operation is exactly 70 cm. Measuring this distance easily and quickly can also be done with the long wrench from the plow set. And accordingly, if there is a need for correction, it should be done in a timely manner. To achieve good plowing, the buoys must be set to the correct depth. The recommended depth is from 2 to 5 cm, depending on soil conditions. It is important that all fenders are regulated equally. The markings on the spokes will help you in the need for adjustments. To ensure a perfect groove, the disc cutter must also be adjusted. It is recommended that it be 1 to 2 cm wider than the creeper. [caption id="attachment_15492" align="aligncenter” width="895"]
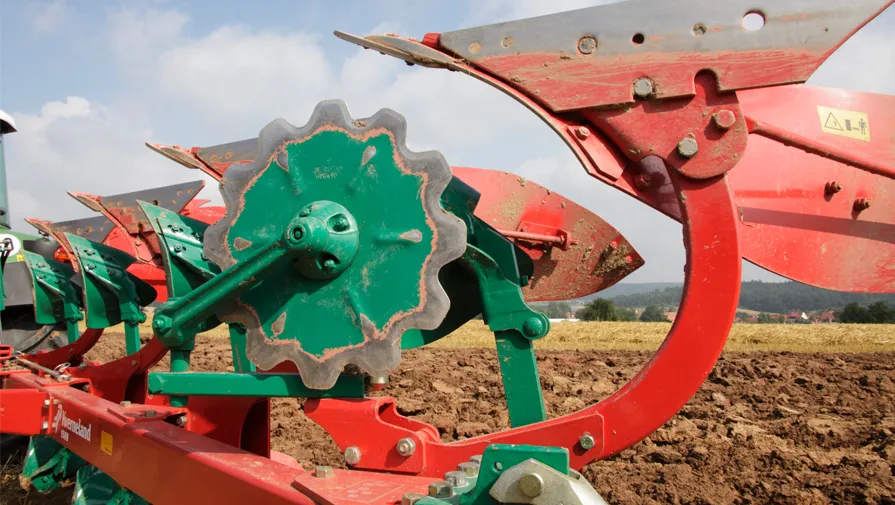
Depending on the soil conditions, the maximum working depth should be between 4 and 15 cm.[/caption] The golden rule states that the disc cutter should be set so that it works at half the depth of the plow. Now your plow is ready to go! It remains to make a few more adjustments, but this time in working mode.See HEREthe continuation of the article to learn how to adjust your Kverneland plow while working in the field, as well as what adjustments you need to make on your Packomat roller. The NIK service team advises you to use only original spare partsfor your Kverneland machines. Only in this way can you guarantee yourself efficiency from year to year.
Other articles
.webp)