NIK service specialists advise: How to prepare your plow for work? - Part 2
Part 3: Adjusting inventory and tractor in field conditions
First of all, we need to check the depth of the plow. Aggregate the plow to the tractor and plow about 10 meters. Then measure at what depth the plow works. If the depth needs to be adjusted, lift the plow and adjust the working depth by the screws on the support wheel.
Damage yourself that both sides of the plow are the same settings.Plow a few more meters to check that the front and back of the plow are at the same working depth. To check this, step back a little from the plow and make sure that the inventory frame is parallel to the field. The third point of the shed should be hooked to the U-shaped hole so that in case of irregularities, the plow can copy the terrain. If on the suspension it is too forward, the first groove will be too deep. And if it is too far back, the furrow will be too shallow. Accordingly, this also affects the back of the plow.
However, with proper adjustment, this can be adjusted so that all plough bodies plow at the same working depth.The third point suspension should always be connected lower on the tractor than on the plow. To ensure that the plow follows the contours of the soil, we recommend using the elliptical hole of the head. To ensure that the plow is not tilted left or right, stand behind the inventory and check that the plow posts are positioned 90 degrees to the ground. If the plow is inclined to the plowed part of the field, the first furrow will be too wide and deep. With the right settings, all plow bodies will have the same working depth. Adjustments to the settings are made by the two screws, located one on the left and one on the right of the plow.Finally, you need to set the working width of the first body.
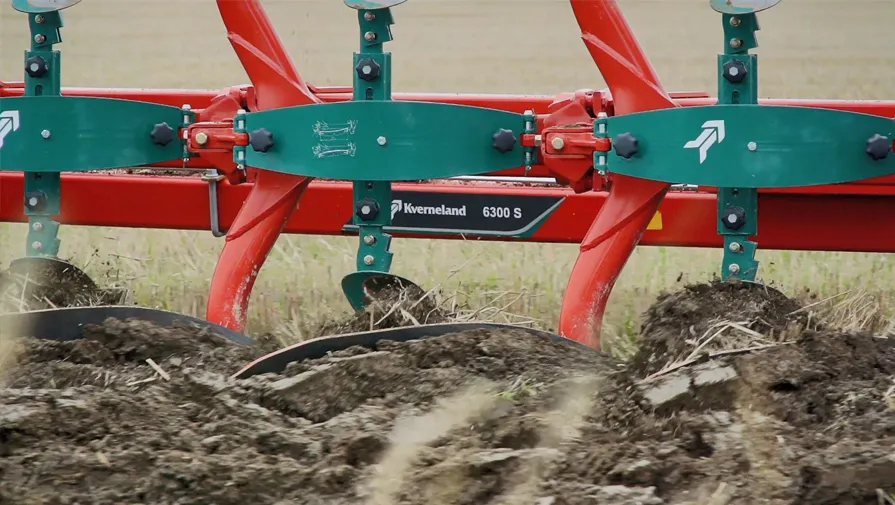
To make sure that Variomatthe indicator(at Variomat plows Kverneland)indicates the correct width of the plow, measure the distance between the blade and the crawler of two adjacent bodies. The first body must be set to the same width.
Adjustments are made mechanically or hydraulically.To find out if you have achieved the desired result, measure a distance of 3 meters on unplowed soil. Plow by passing the measured point and measure again. From the difference between the two measurements, you will find out the real working width of the plow. The Kverneland Variomat offers comfort when plowing, as well as adjusting the working width from the tractor cab.
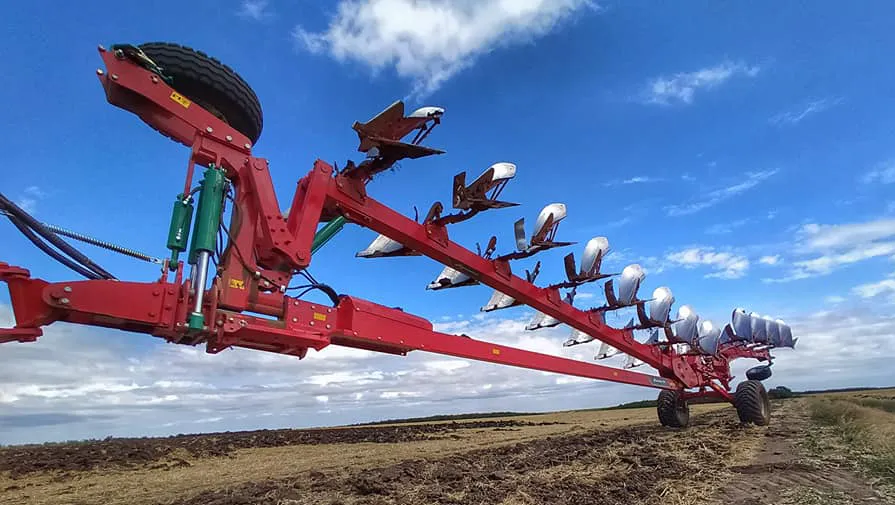
If you own a plow Kverneland P.W.(wagon type plow), it has the same basic settings as the Kverneland turning plows. In view of its size, a little more adjustments are needed. Start by measuring the working depth of the plow. To adjust the working depth, the plow must be raised. First of all, you need to adjust the two stop screws on the support wheel.
Adjust the depth and the first part of the plow.This is done by adding and removing spacers. To check that the plow is set correctly, it must be parallel to the ground. You should check the angle of inclination of the plow. Stand behind the inventory and make sure that the working bodies are available 90 degrees to the ground.
If you change the working depth of the plow, the slope must also be adjusted on both parts of the plow. At the back you need to adjust through the two screws located on the left and right. From the front, the adjustment is made by the cylinder, removing or adding spacers for this purpose. The next step is to adjust the working width of the PW.
This plow also features the Variomat system, which can be activated from the tractor cab. Thanks to this, you can change the working width according to different soil conditions. Check that the specified working width of the indicator corresponds to the one you set. To do this, measure the distance between the blade and the creeper of two adjacent bodies and compare the result. After we have chosen the working width, the first body of both parts must be adjusted.
The exact instructions can be found above in the text.
The main operations are controlled by ATS system(Automation system of hydraulic functions of the plow). It is enough to press the ATS control button three times. In this way, the reversing functions of the system are automatically triggered. After that, the plow is again ready for subsequent operations. The first push lifts the plow and turns its first part in half, and then turns the back of the plow completely as well. The second push completes the rotation of the front of the plow. And the last, third push, lowers the plow.
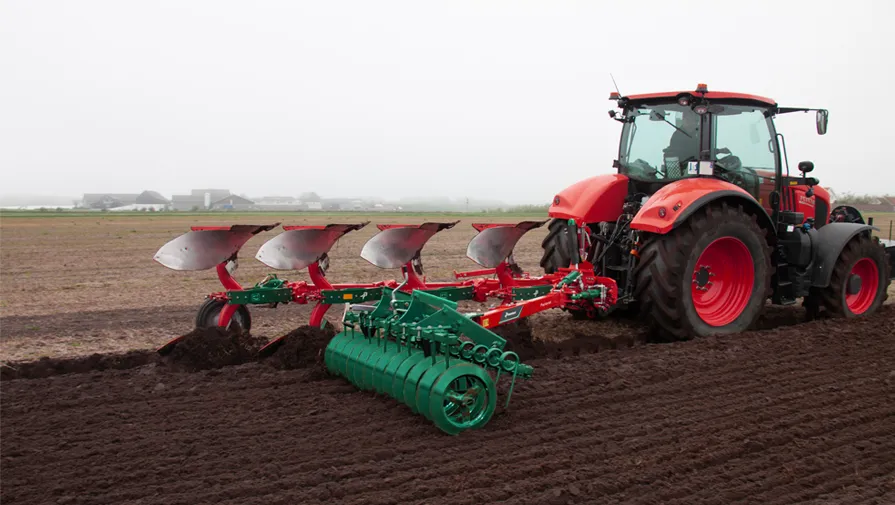
Part 4: Kverneland Packomat - integrated soil roller
Packomatis an integrated roller that connects directly to the plow. Using this combination, the soil will automatically be compacted. In fact, this system works in any operating conditions and does not need additional power.To achieve perfect results, several minimal adjustments are required. Before you start plowing, make sure that the arm of the Packomat roller is positioned centrally relative to the beam. If necessary, make adjustments to the shoulder. It is important that the roller runs parallel to the furrows. The next step is to check the working depth or pressure of the roller. If the pressure is too high or too low, it will affect the processing. The good news is that this too can be easily corrected. Packomat rollershave been used for over 20 years and the field results are excellent. [caption id="attachment_15496" align="aligncenter” width="895"]
All Kverneland inventory is robust, reliable, easy to set up, maintain and operate.[/caption] They are designed to guarantee farmers the best results in the field. They are economical, saving time and fuel. Kverneland plows are world-renowned and have a number of awards for their exceptional quality, reliability and longevity.
Recall HEREthe first part of the article to learn how to tune your Kverneland tractor and plow before starting the handling of the flight. The NIK service team advises you to use only original spare partsfor your Kverneland machines. Only in this way can you guarantee yourself efficiency from year to year.
Other articles
.webp)